
All cats are different, we have tried our best to include as many variables in our calculator as possible, but please remember this is just a guide.
How to use our long-lasting clumping litter
Are you a new cat owner? Or perhaps you're new to using clumping litter? Don't worry, we've pulled together a comprehensive guide on how to use Tippaws Long-lasting Clumping Litter
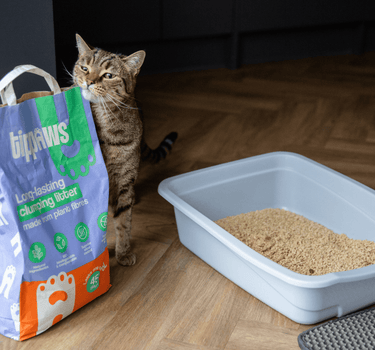
Step 1: Get the right tray setup
What litter tray should I buy?
We always recommend an enclosed litter tray with a high lip and a cat-flap. This gives your cat privacy to go to the loo (we all know how private cats are!). It also helps keep in any pee or poo smells. Finally, it will help minimise any litter escaping the tray while your cat is burying their pee or poo.
There are many litter trays on the market, if you'd like some recommendations please send us your requirements (size of cat, number of cats, aesthetic look) and we will send you a list.
How do I stop litter getting out of the tray?
When cat litter escapes the tray, this is called tracking.
Our Long-lasting Clumping Litter is low-tracking compared to other natural litters on the market. Less than 0.5% of litter in the tray will be carried out of the tray on your cats paws.
Having a tray that has a high lip means it is even less likely that your cat will carry litter out of the tray as they will need to step up and out, so the excess litter will drop in the tray during this motion.
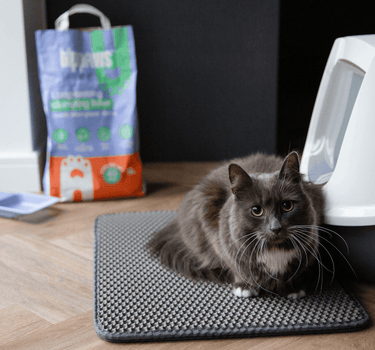
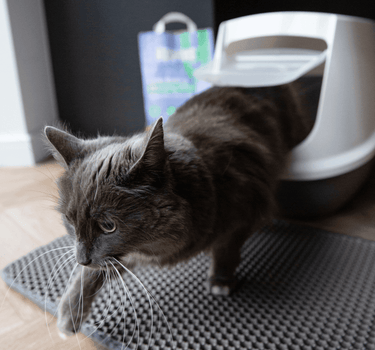
We highly recommend using a tracking mat for any litter. The Pet's Corner mat is the best on the market - trust us, we've tried them all!
What if my cat doesn't like an enclosed tray?
Ultimately, the most important thing is making sure your cat has a litter tray they are comfortable using. If they prefer an open tray there are other things you can do to reduce tracking and to keep bad smells in. We'll go through these later in the guide.
Step 2: Fill the tray with litter - 3-4cm deep
Some cats like a lot of litter, some like little. Observe your cat's behaviour when they are burying and you should be able to gauge what their preference is. If in doubt, we suggest going for more rather than less.
How much cat litter should I put in the litter tray?
As a rough guide, we recommend 3-4cm of litter in the tray as an initial fill level.
Please note: we've found that for customers with cats who like to pee directly on the tray (i.e. dig to the bottom) or for multi-cat households with only one tray, increasing the initial fill makes your litter last longer.
Step 3: Litter tray placement
Where should I put my cat's litter tray?
You want your cat's litter tray to be in the same place at all times so as not to confuse your cat. You wouldn't want to be desperate for a pee and not know where the loo was!
It needs to be in a location that is easily accessible during the day and night.
Litter trays can be disturbing - from the noise cats make when burying to the smell of a poo. Make sure you put it in a place that is least disruptive to you and your family.
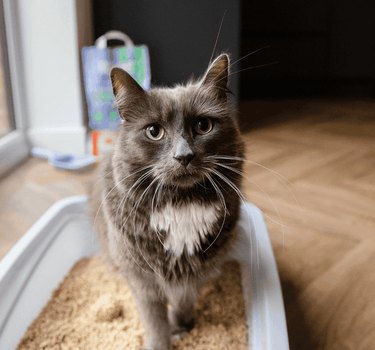
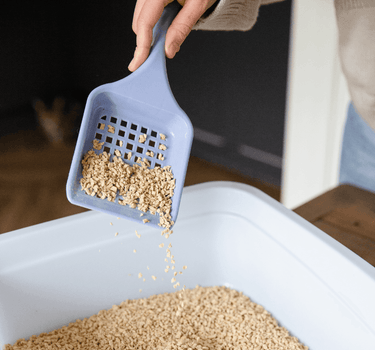
Step 4: Remove clumps and poo regularly
This is the most important step you can take to ensure you can go as long as possible in between full tray changes!
How do I remove clumps of litter from a litter tray?
Use a high quality scoop - our Tippaws Litter Scoop made from recycled ocean plastic works perfectly with our Long-Lasting Clumping Litter.
Scoop out clumps daily or twice-daily depending on how often your cat pees or how many cats you have. Our litter is very tight-clumping so you should be able to remove most, if not all, of the urine-soaked litter that has come into contact with urine. This keeps your tray nice and fresh as you leave behind only non-soiled clean litter.
How often should you remove faeces from a litter tray?
Don't forget to remove faeces 1-2 times a day too depending on how often your cat goes for a number 2!
What is a normal cat pee clump size?
Anything from 20ml to 80ml depending on the size, breed, age and health of your cat. In terms of dimensions, this could be anything between 2cm and 10am in diameter. A litter clump could be spherical or a patty shape.
Top tip: If you use a high quality cat food, like Tippaws dry cat food, it will make your cat's poo smell better.

Step 5: Top up the litter
How often do I need to top up my litter tray?
As you remove clumps, you'll notice the overall fill level of the litter tray decreasing over time. Ensure you are keeping the tray nice and full (3-4cm as a guide) so that all the urine is absorbed by the litter and your tray stays fresh. We recommend a top up every 5-6 days, but you'll get a feel for this after a while.
Step 6: Doing a full cat litter tray change
How often do I need to do a full cat litter tray change?
This depends on so many different factors, a few are:
- Your cat's health and how much he or she pees
- How many cats you have
- How big your litter tray is e.g. an average 40cm (L) x 30cm (W) tray will need an initial fill of 3.6L. A jumbo tray will need a much bigger initial fill.
- Where the tray is located and whether you can smell any bad odours from it
However, as general rule of thumb, we would recommend a full tray change after about 30 days.
Cat litter calculator
Step 6: Disposing of cat litter
There are three main ways to dispose of cat litter outlined below.
1. Flush it
You can flush our litter but only if your waste water supplier agrees. Please check with them first as different water providers have different rules and we don't want you to get in trouble!
Please don't flush faeces - this has health implications.
2. Compost it
You can compost Tippaws Long-lasting Clumping Litter. Please read our composting guidelines below for details.
3. Throw it in the bin
You can throw our litter in your normal waste collection rubbish bin at home. This may seem wasteful but remember you're still reducing your waste significantly by switching to Tippaws litter as you use so little.
Can I compost my cat litter?
We would love for this section to be a one sentence explanation of how to compost cat litter but unfortunately, composting cat litter is complex topic.
Why would I compost my cat litter?
Composting cat litter is an eco-friendly way to dispose of your cat's waste and litter. It helps to reduce waste going to landfills, and the resulting compost can be used as a natural fertiliser for your garden. However, composting cat litter requires special care to ensure it's done correctly and there are potential health risks if you do it wrong.
Choose the right cat litter
Not all cat litter is suitable for composting. Check with the manufacturer of the litter if your litter is compostable. Tippaws Long-lasting Clumping Litter is compostable and is OK Compost Certified. In order to receive this certification the compostability of the litter was tested under ambient conditions (36 degrees celsius), and it was determined that 90% of the litter had completely degraded after 6 months. It’s important to note that this was with fresh litter, not soiled litter.
Collect the cat litter waste
Collect your cat litter waste and litter in a separate container or compost bin. It's important to keep the cat litter waste separate from other compost materials, such as food scraps, as any residual urine or faeces could contain harmful bacteria. We would always recommend removing all traces of any urine or faeces from the litter to be composted to reduce any risk of toxoplasmosis.
Add other organic matter
Once your cat litter waste is ready to compost, add other organic matter, such as food scraps, leaves, or grass clippings, to the compost bin to create a balanced compost pile. This will help the compost break down more quickly and create a nutrient-rich fertiliser for your garden.
Monitor the temperature
The compost pile needs to reach a temperature of at least 60 degrees Celsius to kill any harmful bacteria or parasites. Use a compost thermometer to monitor the temperature and make sure it reaches the desired temperature. The higher the temperature you can get above this point, the better.
Turn the compost
Turning the compost regularly will help it break down more quickly and ensure that all the materials are evenly distributed. Use a compost fork or shovel to turn the pile every few weeks. There are many resources available to give guidance on getting the most from your compost pile. Organisations such as Recycle Now have useful information.
Wait for it to mature
It can take several months to a year for the compost to mature, depending on the materials used and the conditions. Once the compost has turned dark and crumbly and has a sweet earthy smell, it's ready to use as a fertiliser.
It's important to note that composted cat litter should never be used on edible plants, as cat waste can contain harmful bacteria that can contaminate the soil and food. Instead, use the compost on non-edible plants or add it to your soil as a fertiliser.
A final reiteration of safety
While, as far as we are aware, there are no cases of toxoplasmosis being contracted due to cat litter composting, it is incredibly important to ensure that if you decide to compost your cat litter at home, you are taking every precaution to be safe and careful. It is also important that you are comfortable with the personal risk associated with composting cat litter.
Two points we want to reiterate are:
1) Remove all traces of urine and faeces before you compost your litter
2) Do not use your compost on any edible plants or anything intended for human consumption
Sign up to our newsletter for 10% off your first order*
And to stay up-to-date on cat health topics, promotions and discounts